For my final Illustrator project I opted to design the fire truck and fire station. My interest was favoring the fire truck over the kitchen design. It did end up taking me a few hours to create this final project, because it ended up being tedious work.
To start off, I created the fire truck. I managed to do this with all sorts of shapes, both from the shape tools and custom made. One of the hardest parts was making sure everything was scaled correctly to the right widths and heights, because there was no guide placed in Illustrator. Instead, I had to look at the book and get as close as I could through what felt right! Whenever it was possible, I would duplicate the left side of a shape to create the right side, ensuring symmetry.
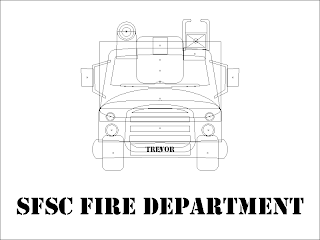
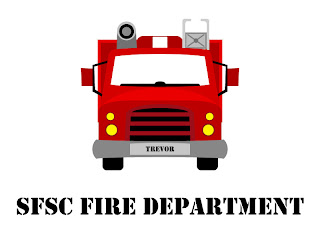
The firetruck was easy to make, but a little bit tedious. I wasn't prepared for how much more tedious the building was going to be. I chose the "New fire station" image to follow, because it had a more head-on angle to go off of. For the most part, I used rectangles to create the shapes composing the building. The sky was created using the rectangular shape tool filled with a "sky" blue gradient. I've included a screenshot of the wireframe for both the firetruck and fire station because I find them to be very pretty and interesting to look at! (The final dimensions on the document were 1700x1400, or around there, so the JPG I have included is at 60% of the original size.)
To create the "Mandala" image, I placed an ellpse shape on the artboard and warped it with the "Twirl" tool. I then created a polar grid that I duplicated and rotated the warped shape around to create a mandala.
To create the "MIami Heat" motorcycle jacket image I took the mandala I created and added two text layers created using the Type on a Path tool. I placed the design on top of the motorcycle jacket and lowered the opacity to 50%.
To create the rose image, I placed a polar grid on the artboard and warped it with the "Wrinkle" tool. I duplicated it twice more and rescaled / re-wrinkled each duplicate rose. I placed an ellipse shape on the bottom of the artboard and used the "Twirl" tool to warp it, changing the stroke of the shape to a Chalk brush to give it some texture. I then placed the image on top of the motorcycle jacket and changed the blending mode to "Luminosity".
To create the "Angel Fish" image I layered multiple wavy pen tool shapes on top of each other and blended them together with "Gaussian Blur" filters. I created line paths with the pen tool that I filled with green colors and blurred to create the seaweed, then I created the fish using an oval, ellipse, and pen tool shapes filled with radial and linear gradients. The bubbles were made with a light blue to dark blue gradient topped with a white-to-transparent shape layer that was blurred to give them a depth effect. The text was created by converting the type into an outline so I could apply a gradient to it and then a custom clipping mask was created to fit the entire image directly onto the surfboard.
To create the "Tartan Mills" logo I imported the original scotty dog image into Illustrator and set it as a template so I could trace the outline of the scotty dog with the pen tool. I took the path I created and pasted it into a new document where I added the text above and below it.
To create the "Tartan Mills Tee Shirt" I opened the image of the gray tee shirt in Illustrator and pasted my "Tartan Mills" logo design above it. I scaled it down to fit onto the shirt, changed it's opacity to 60% and set the blending mode to "Soft Light". I duplicated a version of the logo and scaled it down even further to make it fit onto the clothing tag.
To create the "Crane Airlines Tee Shirt" I opened the image of the blue tee shirt and the "Origami Paper Crane" I created in the previous assignment, added text above the paper crane and then pasted the entire design onto the image of the tee shirt. I set the blending mode to overlay and changed the opacity to 80% before duplicating the logo, changing the colors to completely black, and rescaling it down to fit onto the clothing tag.
To create this abstract image I practiced drawing shapes with the pen tool and filling them with various colors, patterns, and gradients while adjusting their opacity.
To create this "Paper Airplane" I made the grid visible above the artboard and created several triangles with the pen tool, moving them above and below each other and filling specific ones with black to achieve the overall image.
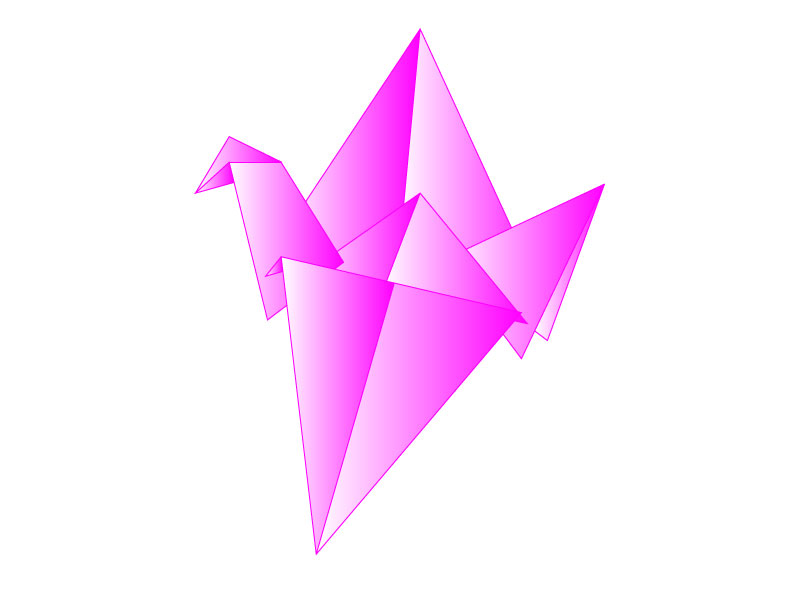
To create this "Origami Paper Crane" I created several triangles with the pen tool and filled them with the "Live Paint Bucket" feature. I moved the triangular layers above and below each other to make sure the image looked correct.
To create the "New York City Poster" I used line segments and curved paths to live trace the outline of a diamond. I filled it with the "Live Paint Bucket" tool and re-scaled it before adding a drop-shadow and changing it's blending mode to "Multiply". I pasted a photo of New York City into the background, duplicated the diamond above it and re-filled the duplicate diamond with white-to-transparent gradients. I added the text in front of a black rectangle set to "Overlay" mode with an outer-glow.
To create the stamp, I placed a small rectangular shape onto the artboard and ran the "Zig-Zag" and "Drop-shadow" filters on it. I pasted my New York City poster above it and re-scaled the poster down to fit into the stamp. I took the liberty of adding a blue radial gradient background and re-scaling the entire stamp up in size to make it more visible (for the purpose of viewing in this blog).
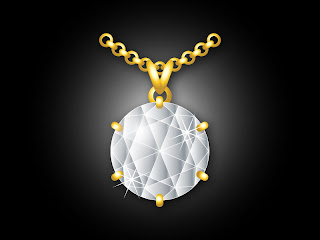
To create the "Diamond Solitaire Necklace" I took the diamond symbol I made in the previous assignment and filled it with gradients using the "Live Paint Bucket" tool. I created various ellipse and rounded rectangle shapes and filled them with metallic gold gradients to create the necklace components. To give the diamond a little more depth I added a circular shape above the diamond and filled it with a radial white-to-transparent gradient and positioned the center of the gradient near the top-left of the shape. Also, I used the star tool to create small 'diamond sparkles' to make the diamond pop.
To create whatever the following is (I didn't have much of a plan, I just wanted to play around and see what I could do!) I duplicated the diamond multiple times and arranged it around the perimeter of the original. I changed the color of the diamond in the original to red and created various 'diamond holders' with metallic gold gradient fills. Also, to give the 'diamond' a little more depth, I added a circular shape filled with a linear white-to-transparent gradient which I blurred with the "Gaussian Blur" filter.