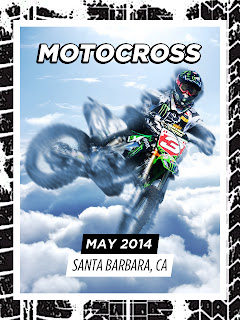
To create this image:
- Created a 600x800 pixel document.
- Found and pasted an image of a beautiful, cloudy sky into the document.
- Found an image of a dirt bike rider and used the quick selection tool + refine edges tool to extract him from his background.
- Pasted the image of the dirt bike rider into my main document.
- Carefully positioned the rider into the correct area and then used the curves tool to lighten him to match the sky.
- Duplicated the rider, selected the original layer, and then used the smudge tool to create a motion effect.
- Used the hue/saturation tool to adjust the smudged rider to a blue hue.
- Added a layer mask to the duplicated rider (top layer) and masked some the bike off to blend into the smudged layer.
- Used the type tool to create the text layers, adding a deep drop-shadow to the "MOTOCROSS" layer.
- Used the rectangle shape tool to create the black and white slanted backgrounds behind "MAY 2014" and "SANTA BARBARA, CA".
- Increased the canvas size to 120%.
- Used the rectangle shape tool to create a white border and a black background.
- Found an image of a dirt bike tire track, ran the Posterize filter on it a few times, and placed on top of the black background to give a textured border look.
Image:

No comments:
Post a Comment